|
HCI ORPG Logger Version 2.0 - July 2004 by Thomas A. Andretta NWSFO PIH |

 Operational Instructions Operational Instructions |
| The HCI ORPG Logger program contains 3 main windows to generate the ORPG log: |
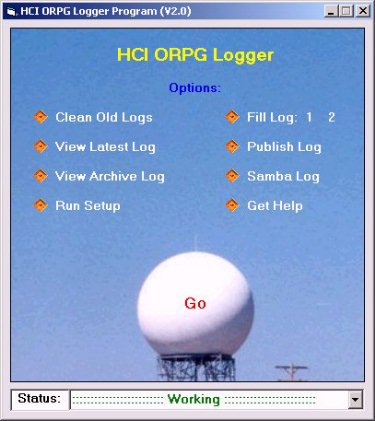
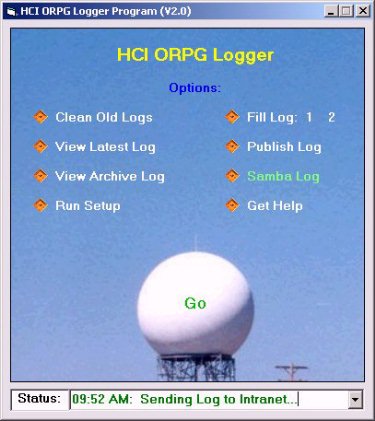
(1) Main Window:
| Passive State: | Active State: |
 |
 |
| Instructions: |
Click on each of the buttons with the left mouse button to perform the indicated task. The user must select a choice from the menu and click on the Go button to process the request. The Status Box provides a history of previously entered and processed commands. |
| Tips: | Remember to click the Clean Old Logs and always clean out the old ORPG logs at the beginning of the Midnight shift. |
|
The Fill Log: 1 2 buttons access the pages for completion of the ORPG log. |
|
| Remember to click the Publish Log button to generate the ORPG log for each shift. | |
|
The Publish Log button will be highlighted in yellow to alert the user to publish the log. Watch for it! |
|
|
Click the Samba Log button to send the log to the Intranet using the Samba option. |
|
|
Click the Run Setup button to run the setup utility as described in the Setup Instructions. |
|
|
Click the Get Help button to request the online help file. |
|
| The user has 2 options to print the ORPG log files: | |
| Print the ORPG log at the end of the Evening shift using the View Latest Log button. The format of the ORPG log files is: ORPGLOG2.HTML. | |
| Print the ORPG log at the end of the Evening shift using the View Archive Log button. The format of the ORPG log files is: MMDDYY.HTML (e.g., 101802.HTML). | |
| The ORPG log should be printed on 1 page for clarity and readability. | |
For example, print the ORPG log on a color HP 2500C Serial Printer using this Page Setup:
|
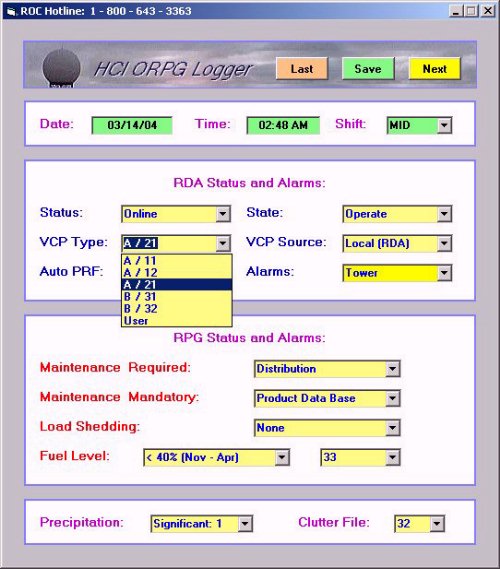
(2) ORPG Log: Fill Log (Page) 1:
| Active State: |
 |
| Instructions: | Fill in each of the fields with the left mouse button or type in an entry into each box. |
| Tips: | Fill in all the entries on Page 1 of the ORPG log. |
| Click the Last button to load the last edited shift entries. | |
| Click the Save button on the page to save the entries. | |
| Click the Next button to continue processing the log. |
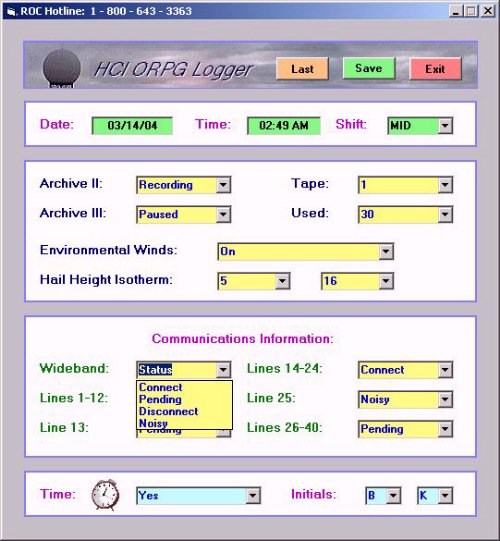
(3) ORPG Log: Fill Log (Page) 2:
| Active State: |
 |
| Instructions: | Fill in each of the fields with the left mouse button or type in an entry into each box. |
| Tips: | Fill in all the entries on Page 2 of the ORPG log. |
| Click the Last button to load the last edited shift entries. | |
| Click the Save button on the page to save the entries. | |
| Click the Exit button to exit the window. | |
Click the  icon to check the date and time online. icon to check the date and time online. |

